More Work

FlowPrint

A 3D printing onboarding system designed to make a beginner's first print succeed, not just start.

FlowPrint project visual

From roughly an hour of setup anxiety to a guided fifteen-minute path in.

Intro

The first print has to succeed, not just start

FlowPrint is a consumer 3D-printing HMI whose target journey cuts first-print setup from about an hour to roughly fifteen minutes.

Consumer printers sell creativity. What first-time owners actually buy is a second hobby: Wi-Fi, leveling, slicer vocabulary, filament chemistry, and error screens that assume they already speak the machine.

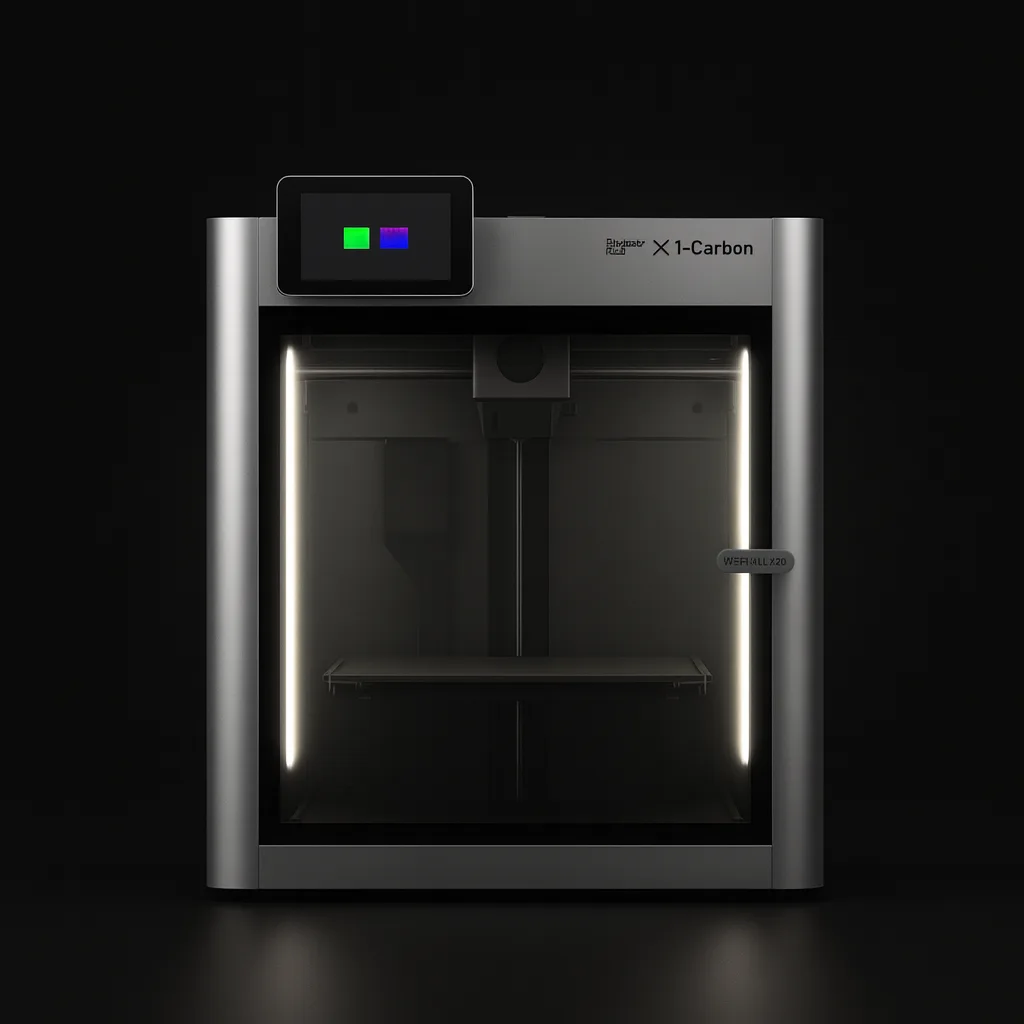
I led product design for that first hour. The work sits on a Bambu Lab X1 Carbon chassis, not a rebranded printer: FlowPrint is the onboarding, the material lesson, and the monitoring, written for people who want a part, not a workshop.

Role

Lead Product Designer

Timeline

2025

Team

Product · Engineering · Manufacturing

Scope

Onboarding · Monitoring UI · Material Guidance

Outcome

~1 Hr Setup → ~15 Min · Target Journey

Tools

Figma · Flows · Specs · Usability
Highlights

A first print should end in a part, not a vocabulary lesson.

First-time vs Pro forkTarget setup ~1 hr → ~15 minFilament as a lesson, not a specAuto-setting for print oneMonitoring that names the next step

The first print has to succeed, not just start.

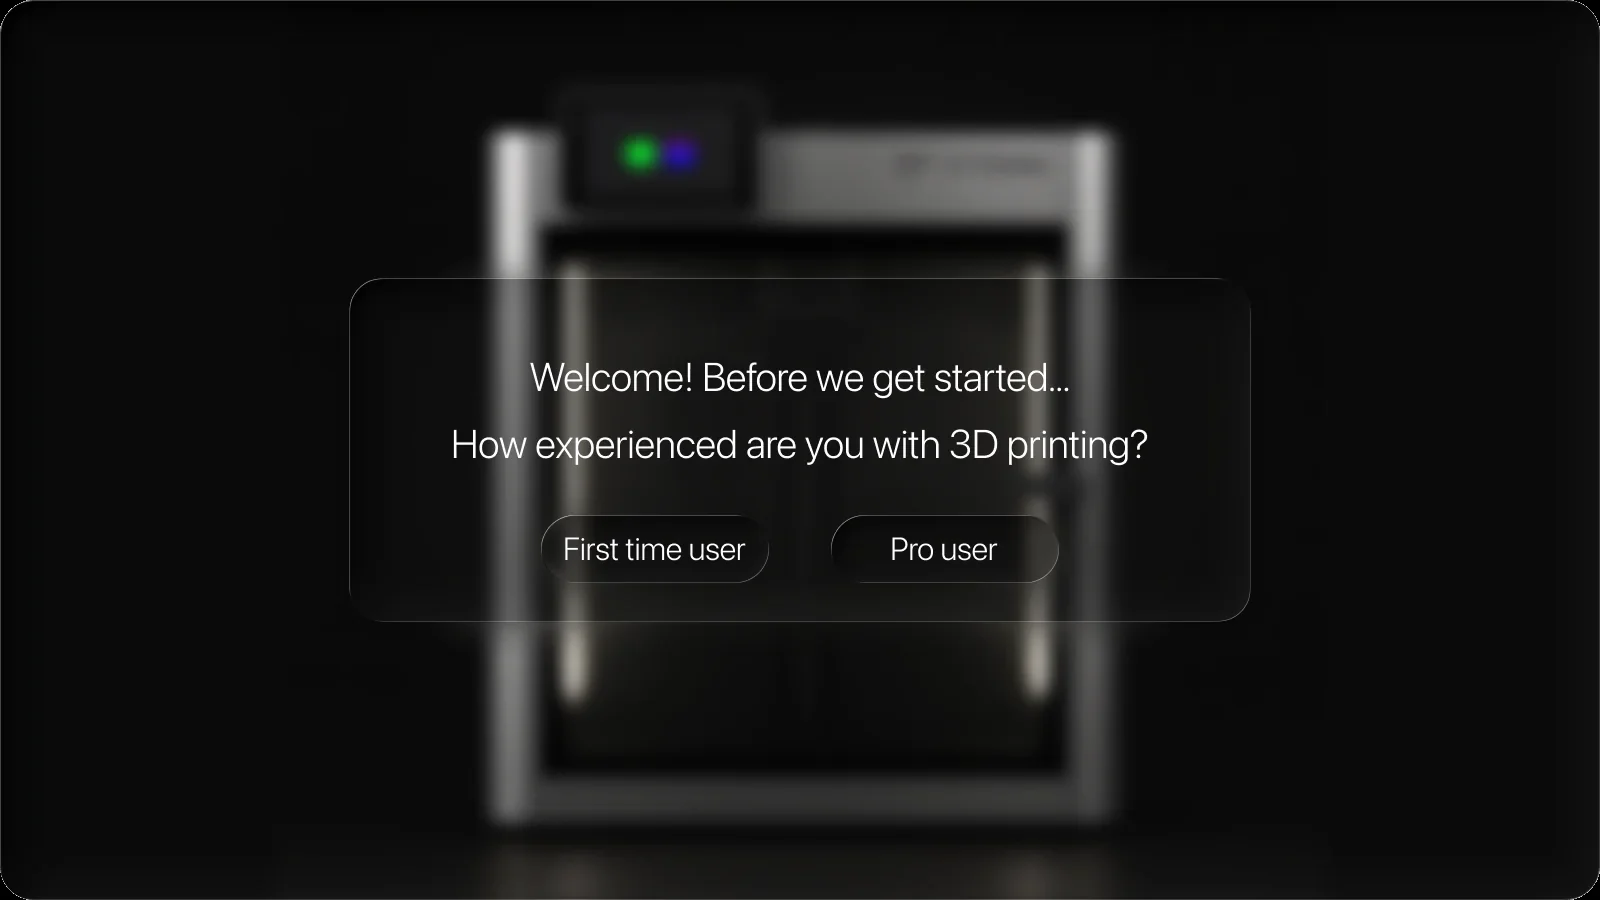
The only fork: first-time walks setup, Pro goes home

FlowPrint welcome screen asking how experienced you are with 3D printing, with First time user and Pro user

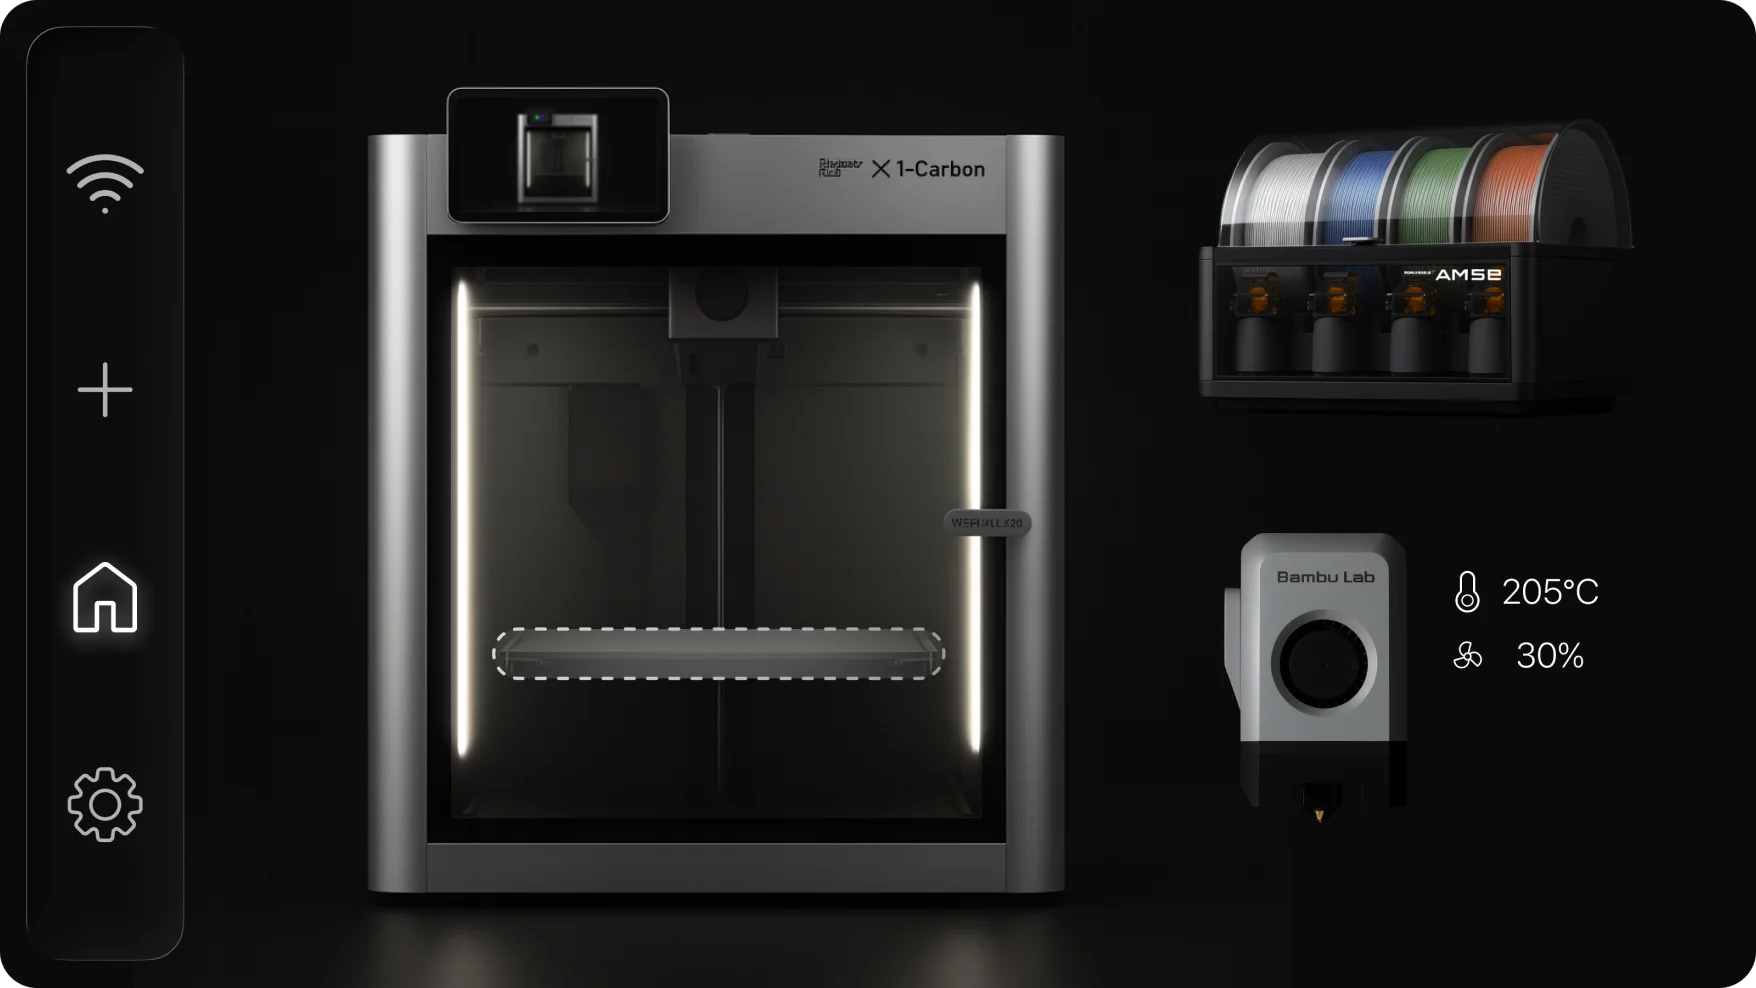
Home is the idle machine, not a dashboard of parts

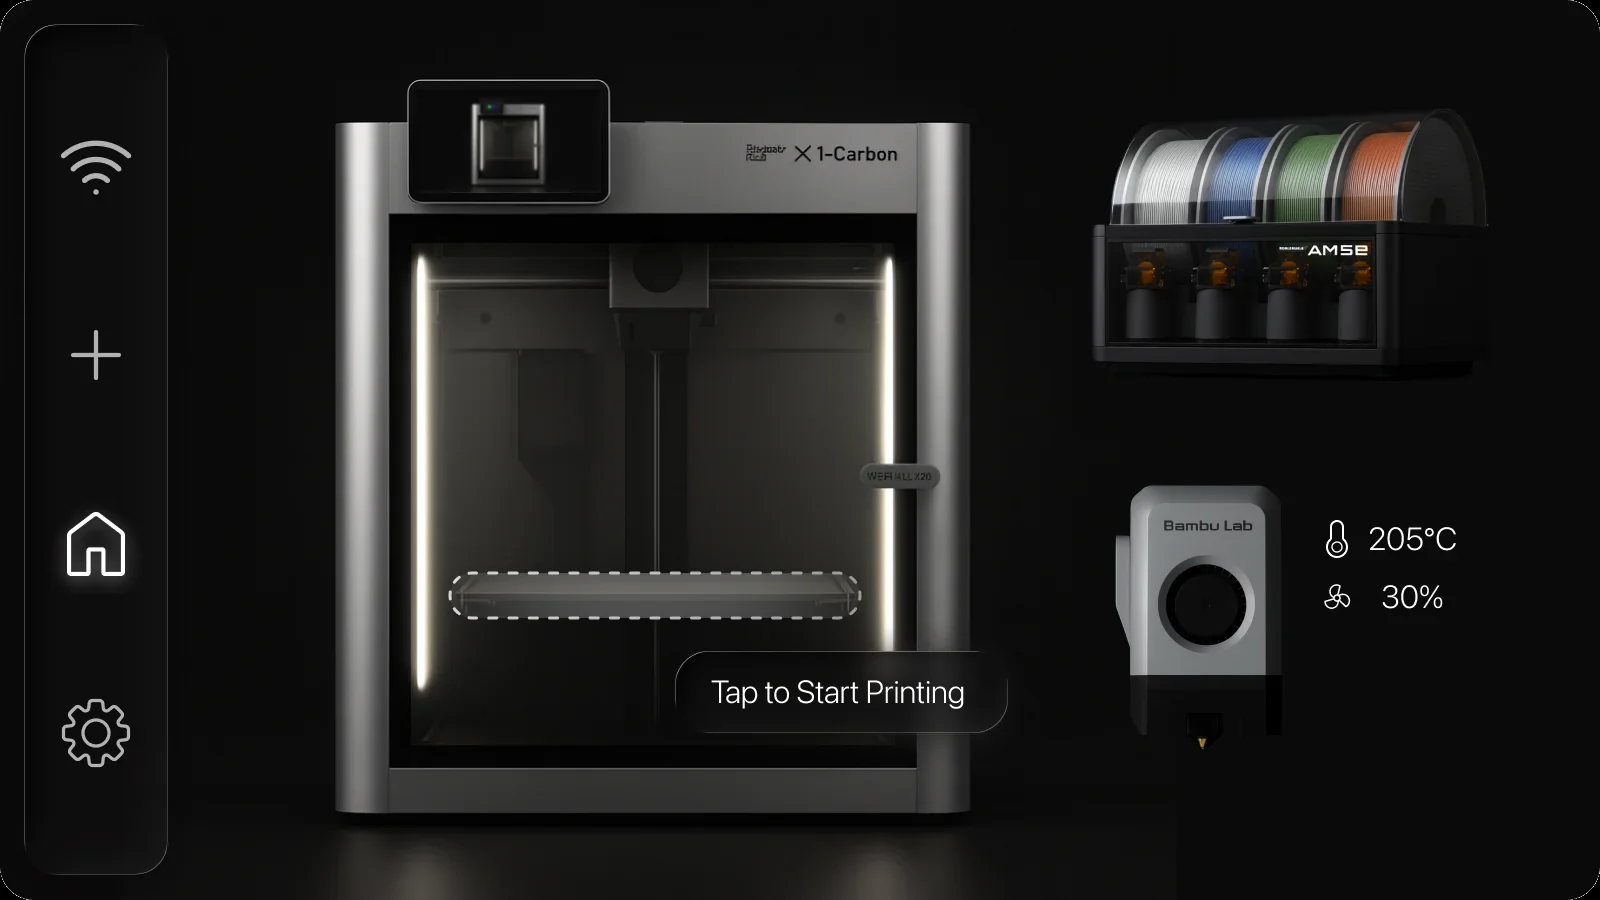
FlowPrint home on the printer screen: the machine in view, Tap to Start Printing, AMS spools, and head temperature

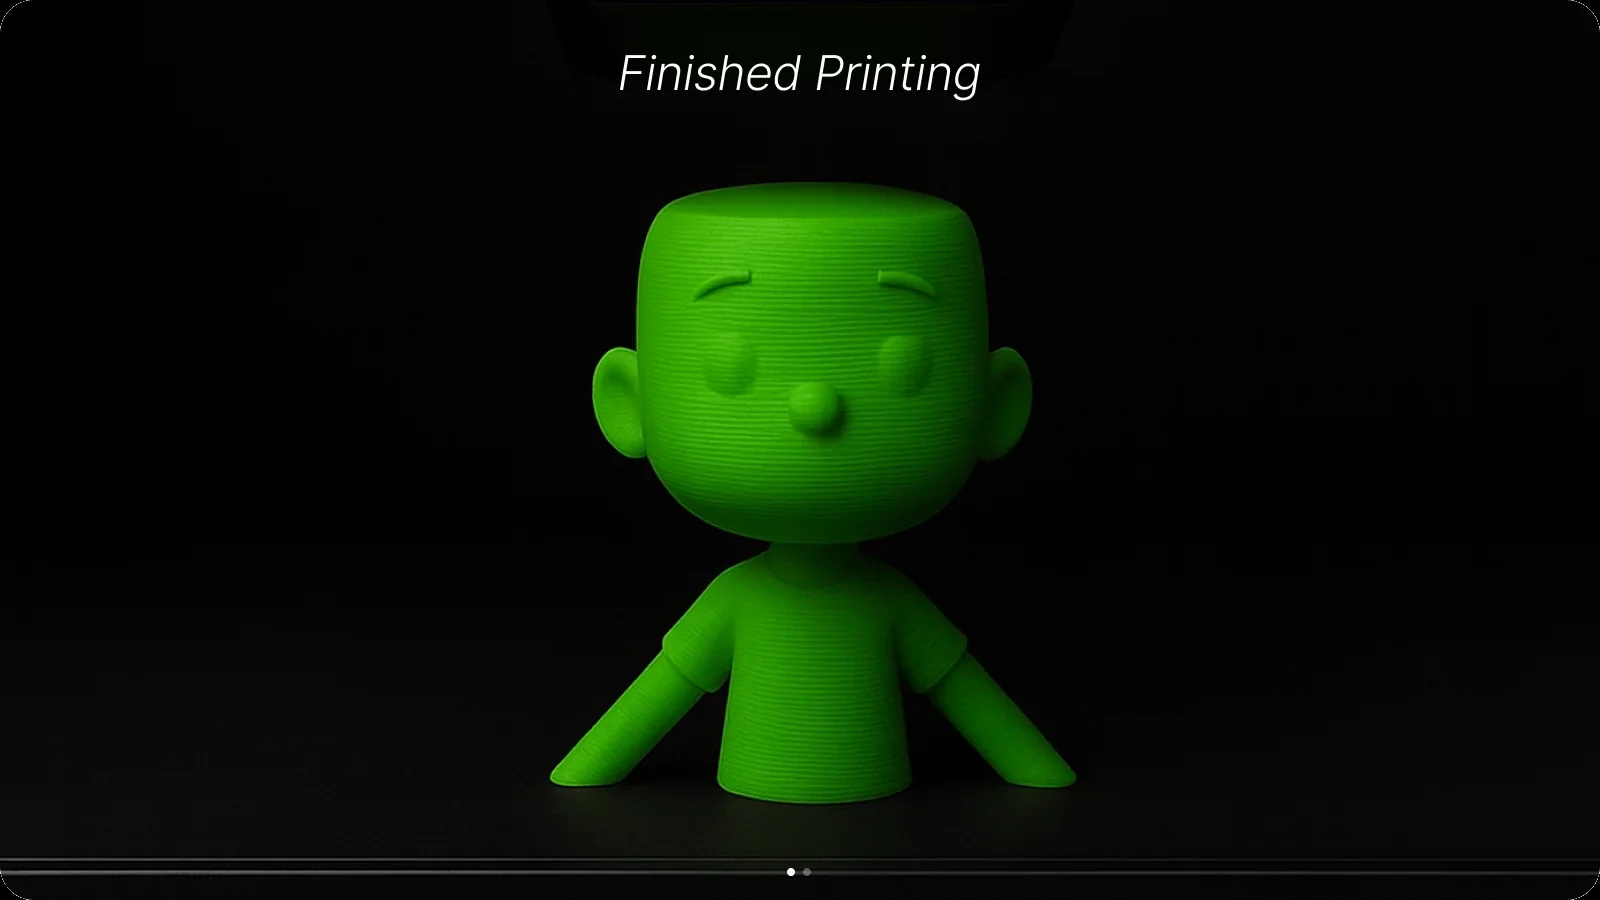
The first print ends in a part, then a two-card summary

FlowPrint finished-printing screen with a green printed bust and the title Finished Printing

Situation

The creative promise stops at the box

Rookies do not arrive wanting to learn 3D printing. They arrive wanting the object they saw: a bust, a bracket, a gift. The hour between unboxing and the first layer is where most of them bounce.

The machine is already capable. The path in is written for people who already know it, sitting between playful maker culture and the calm of an appliance that just works.

Research

Rookies fail before they print

I focused the research on first-time and rookie owners, not the forum experts who enjoy the hobby. Support tickets, maker-forum threads, and novice interviews clustered around the same three hours: setup, first print, and the moment after something goes wrong.

What First-Time Owners Kept Hitting

01

The Hour Before the First Layer

Wi-Fi, leveling, firmware, and a box of parts. Rookies described setup as a second job they did not sign up for.

02

Vocabulary as a Gate

Layer height, infill, supports, flow. The first print asked them to speak shop before they had a reason to care.

03

Material as a Guess

PLA, PETG, ABS, TPU, PC. The spool does not explain itself, and picking wrong is how the first print warps or fails.

04

Errors With No Next Step

When something broke, the screen named a sensor or a code. The question people actually had was what do I do now.

05

Two Screens, One Engineer Voice

First-time owners already bounce between a phone app and a machine screen. Both talk in nozzles and percentages. Neither is written for the first hour.

First Direction: Phone and Machine

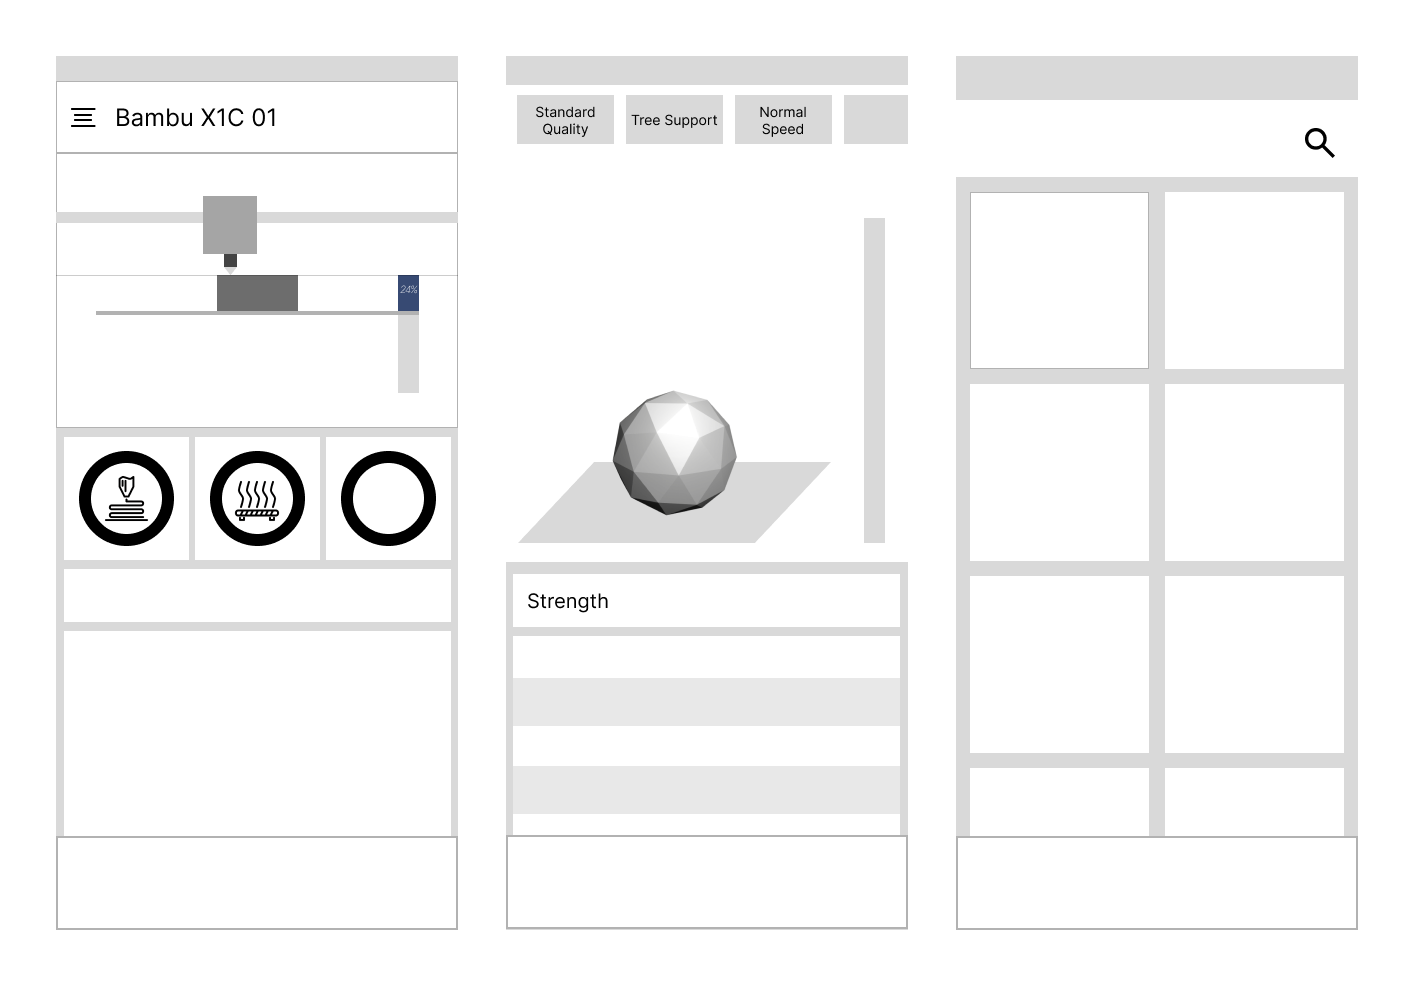
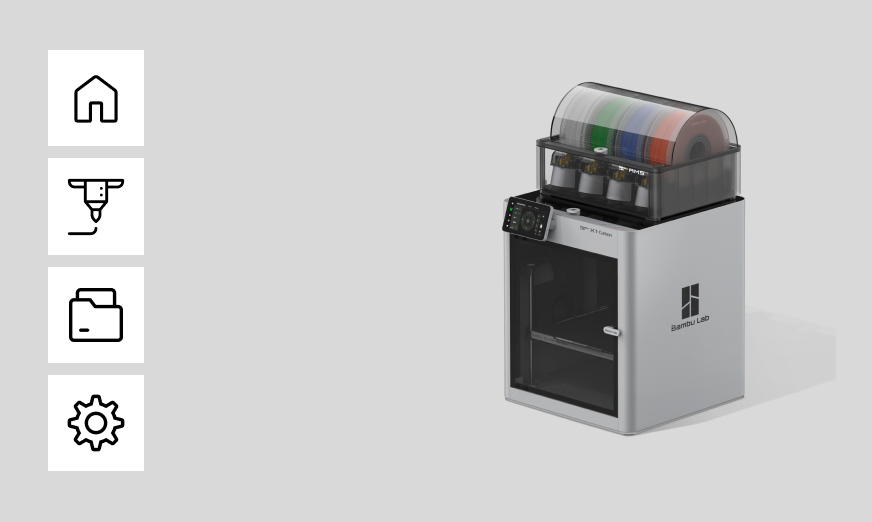
Those findings went into lo-fi. I designed both surfaces: a phone companion and a machine screen, because first-time owners already bounce between the two. The phone still spoke in nozzles, beds, and a 24 percent bar. The machine put the printer on the glass, then a rail of home, nozzle, files, settings.

Three lo-fi phone wireframes from the first direction: a status home, a slicing screen labeled Quality Speed and Strength, and a model-library grid
Phone lo-fi: a companion app that still talks in nozzles and a 24 percent bar
Lo-fi machine-screen layout from the first direction: a rail of home, nozzle, files, and settings beside a render of the X1 Carbon
Machine lo-fi: the printer on screen, chrome still a shop diagram

Insight: Covering both surfaces did not make either one beginner-friendly. Same shop voice, twice.

Design Challenge

Get them to a part without teaching the shop

The question I kept returning to: how might we guide someone from box to first successful print without forcing slicer vocabulary on day one?

The system needed progressive disclosure, an experience fork, and monitoring that names the next action instead of the sensor.

Design Requirements

01

One Job Per Screen

Network, then filament, then a model. Never a control panel on day one.

02

Ask Experience Once

First-time walks setup. Pro skips it. The fork is the product, not a settings buried later.

03

Teach the Material

Best for, pros, watch out. A lesson, not a filament chemistry sheet.

04

Auto-Setting for Print One

Quality as Extra Fine. No layer height. The slicer stays offstage.

05

Monitoring That Reassures

Progress, then a part, then four facts. Not a live log of temperatures.

Decision: Hide the slicer. Teach the material. Ask experience once.

Design Process

Two lanes, then one print

Journey maps split the work into setup, first print, and steady use. First-time owners need the first two. Pro users already live in the third. The fork on welcome is how those maps became a product.

The Target Journey

First time

  1. 01Welcome
  2. 02Network
  3. 03Filament lesson
  4. 04Load slot
  5. 05Home

Pro

  1. 01Welcome
  2. 02Home

Shared print path

  1. 01Models
  2. 02Auto Setting / Prepare
  3. 03Start print
  4. 04Watch it finish
  5. 05Summary

Setup as a sequence, not a checklist

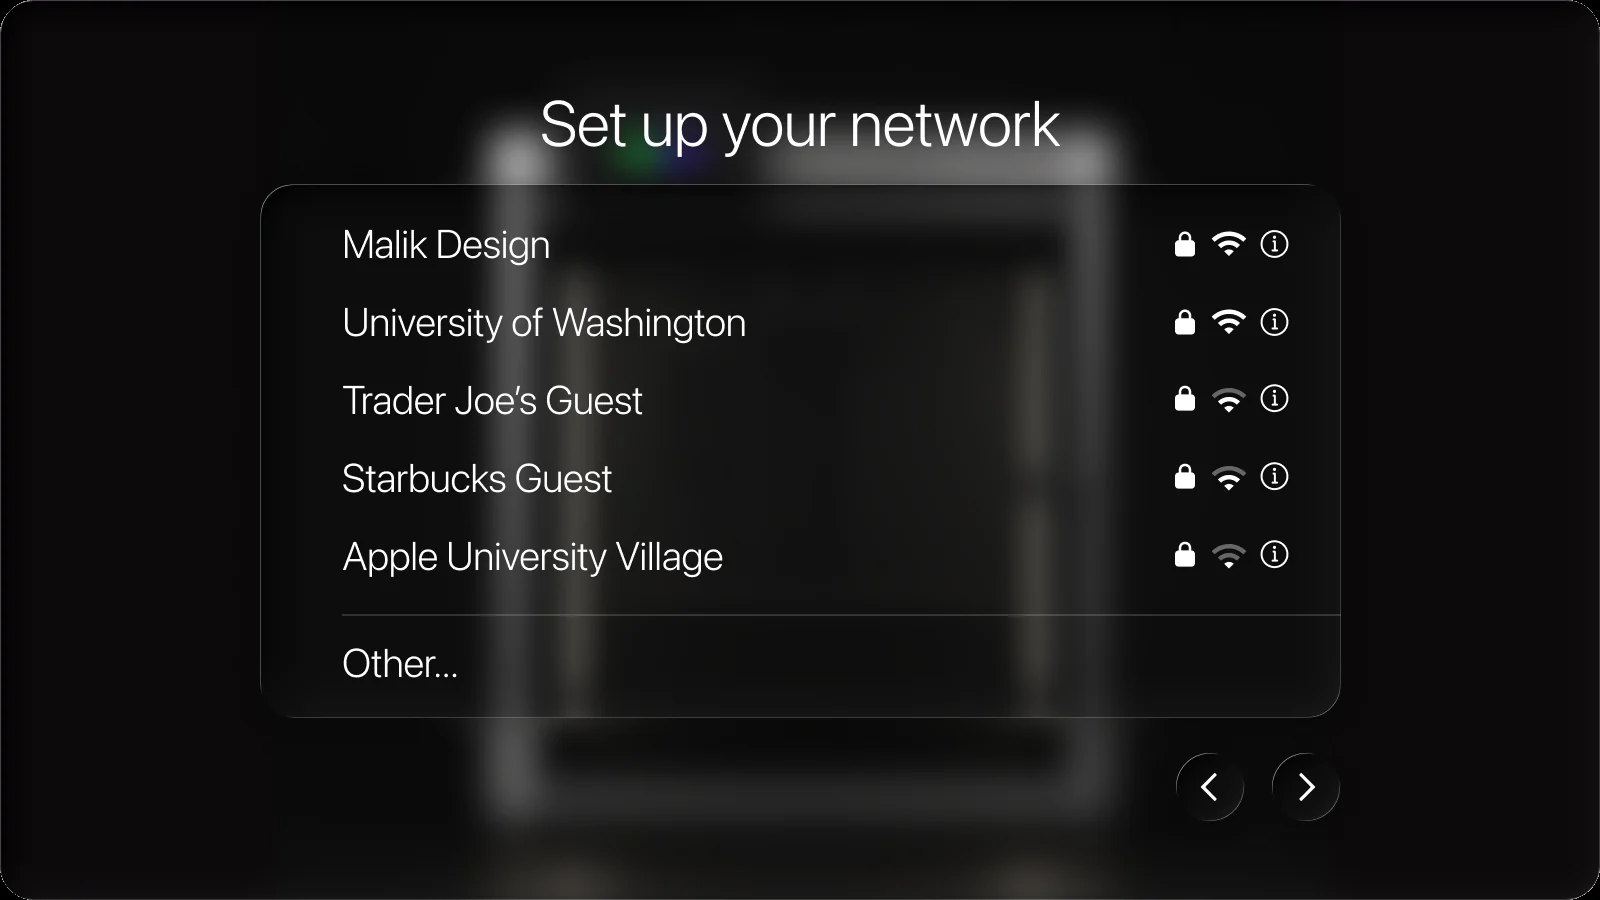
First-time setup is three jobs in order: join a network, learn the filament, load the slot. Each screen has one question. The live device state is there, but it does not compete with the step.

FlowPrint network setup on the printer screen: a glass list of Wi-Fi names including Malik Design and University of Washington
Network: one job, then the next: pick a network before anything else

The material step carries the most doubt

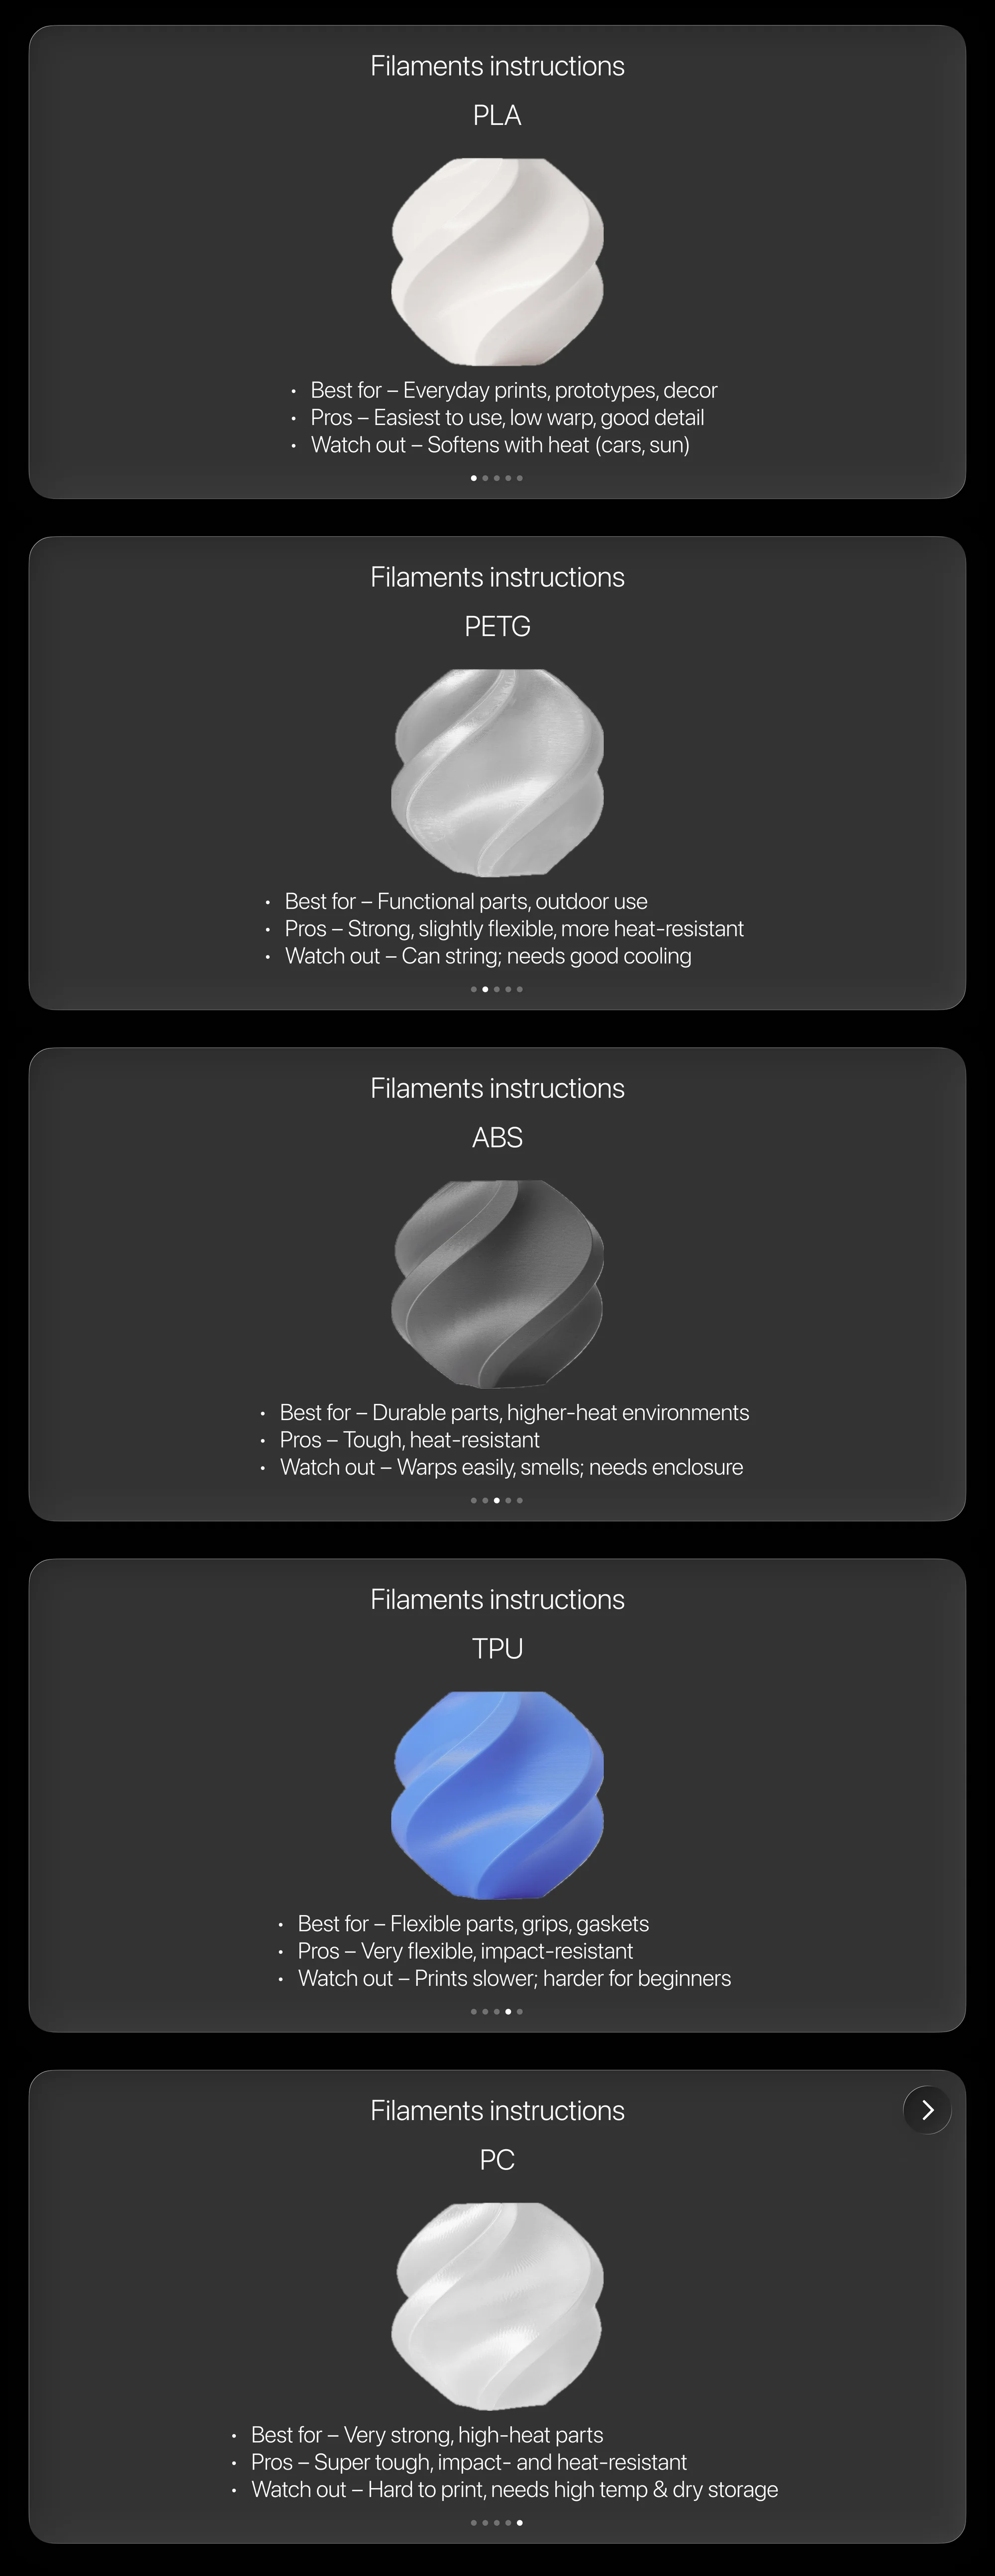
PLA versus PETG versus ABS is where rookies stall. I designed that moment as a short lesson: what it is for, why you would pick it, what to watch. One good suggestion removes more anxiety than a wall of temperatures.

Five filament instruction cards for PLA, PETG, ABS, TPU, and PC, each with best for, pros, and watch out
Filament lesson: a recommendation engine as five slides, not a settings dump

Decision: Teach the material. Auto-setting takes the first print. The slicer stays offstage.

Iterations

Both surfaces, then the machine only

The first direction was both: a phone companion and a machine screen. I cloned the density of a shop UI, then tried to rename the slicer so a rookie would not have to say layer height on day one.

Kinder language on the phone. A photo of the chassis on the machine. They still had to operate a shop before they had a part.

Early machine-screen dashboard with a four-icon rail beside the X1 Carbon
V1 machine: on the printer, still a diagram of parts
V2

The Machine Screen as a Dashboard

What I Tried

Lean on the printer: a photo of the chassis, a rail of home / nozzle / files / settings.

What Broke

The photo helped. The chrome was still telemetry. First-time owners do not need a nozzle icon before they have printed.

V3

Machine Only, Graphic Enough for a Beginner

The Shift

Drop the phone. Design the printer's own 16:9 glass as the first-print surface: a graphic, beginner-facing HMI instead of a shop diagram.

What Held

Welcome asks experience once. Setup is Wi-Fi and a filament lesson. Auto Setting, not a slicer. Monitoring that ends in a part, not a log.

The cut that held dropped the phone. The first print happens on the printer's own 16:9 glass, more graphic than the lo-fi dashboard, written so a beginner can finish without a companion app. Welcome asks experience once. First-time walks network and filament. Pro skips to home. Both share the print path.

FlowPrint welcome asking How experienced are you with 3D printing, with First time user and Pro user
V3 fork: ask once, then the path splits

Decision: Machine only. Graphic enough for a first hour. The phone is not the onboarding.

Final Design

A machine you can finish a first print on

The panel below is the printer's own screen. First-time walks network, filament, and a model onto the plate. Pro skips to home. Both share the print path. Print time-lapses in a few seconds so you can finish it; the nine-hour label is the designed duration, not the wait.

Welcome! Before we get started...

How experienced are you with 3D printing?

Pick a model, not a profile

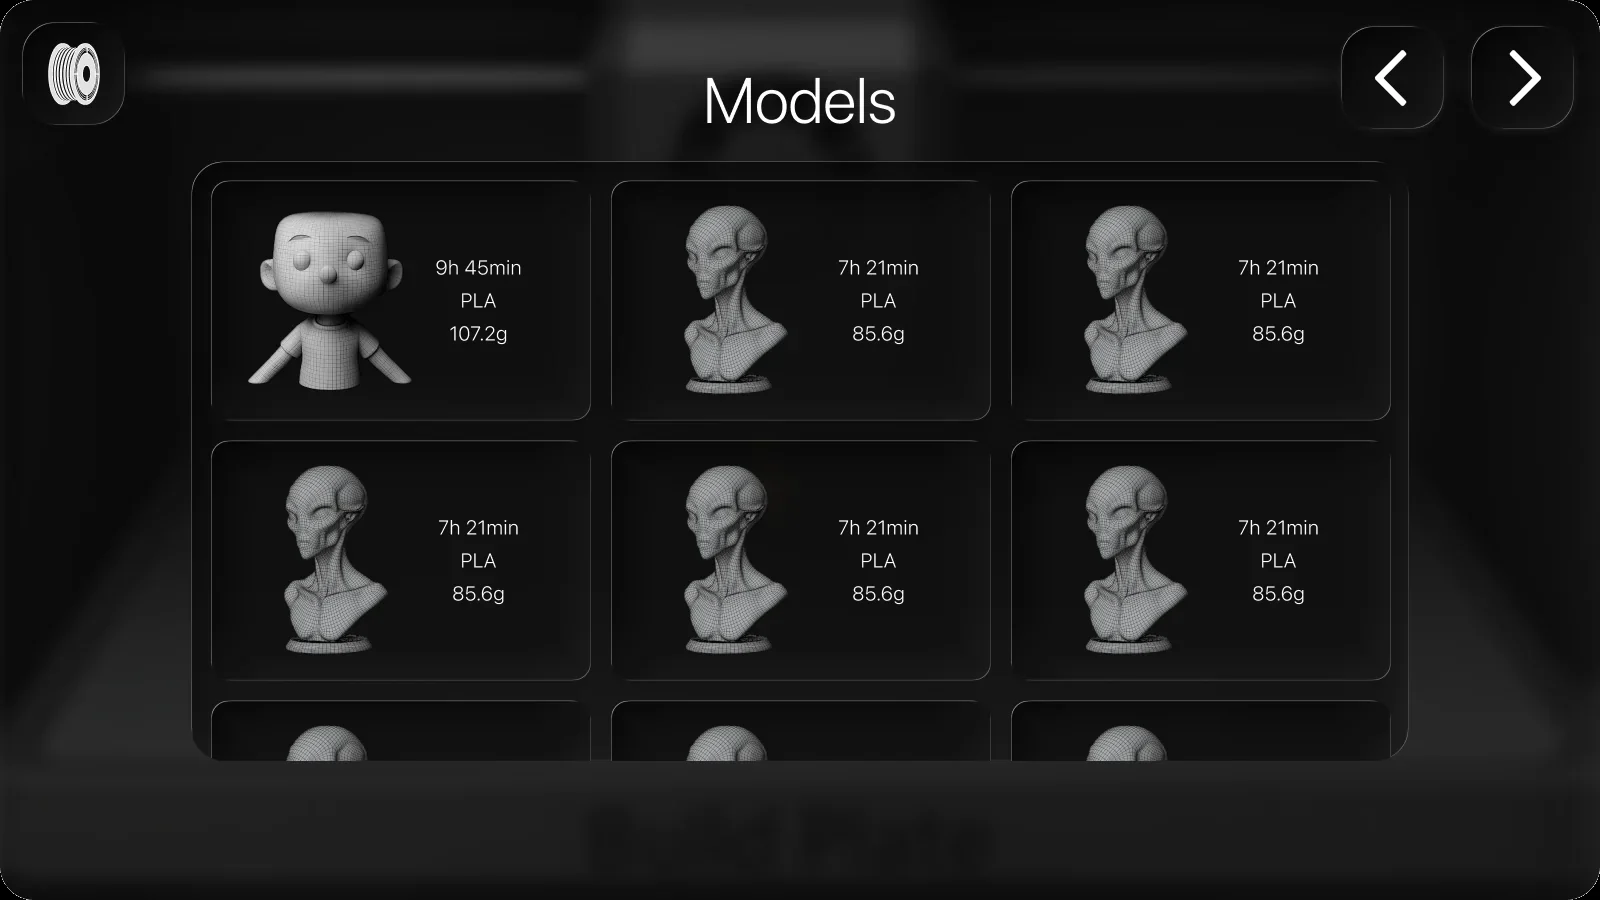
The library leads with the object, the time, and the grams. No layer height, no infill, no support tree to configure on day one.

FlowPrint Models grid: each tile shows a bust, print time, PLA, and grams
Models: time and grams on the tile, not a slicer

Auto-setting is the first-print slicer

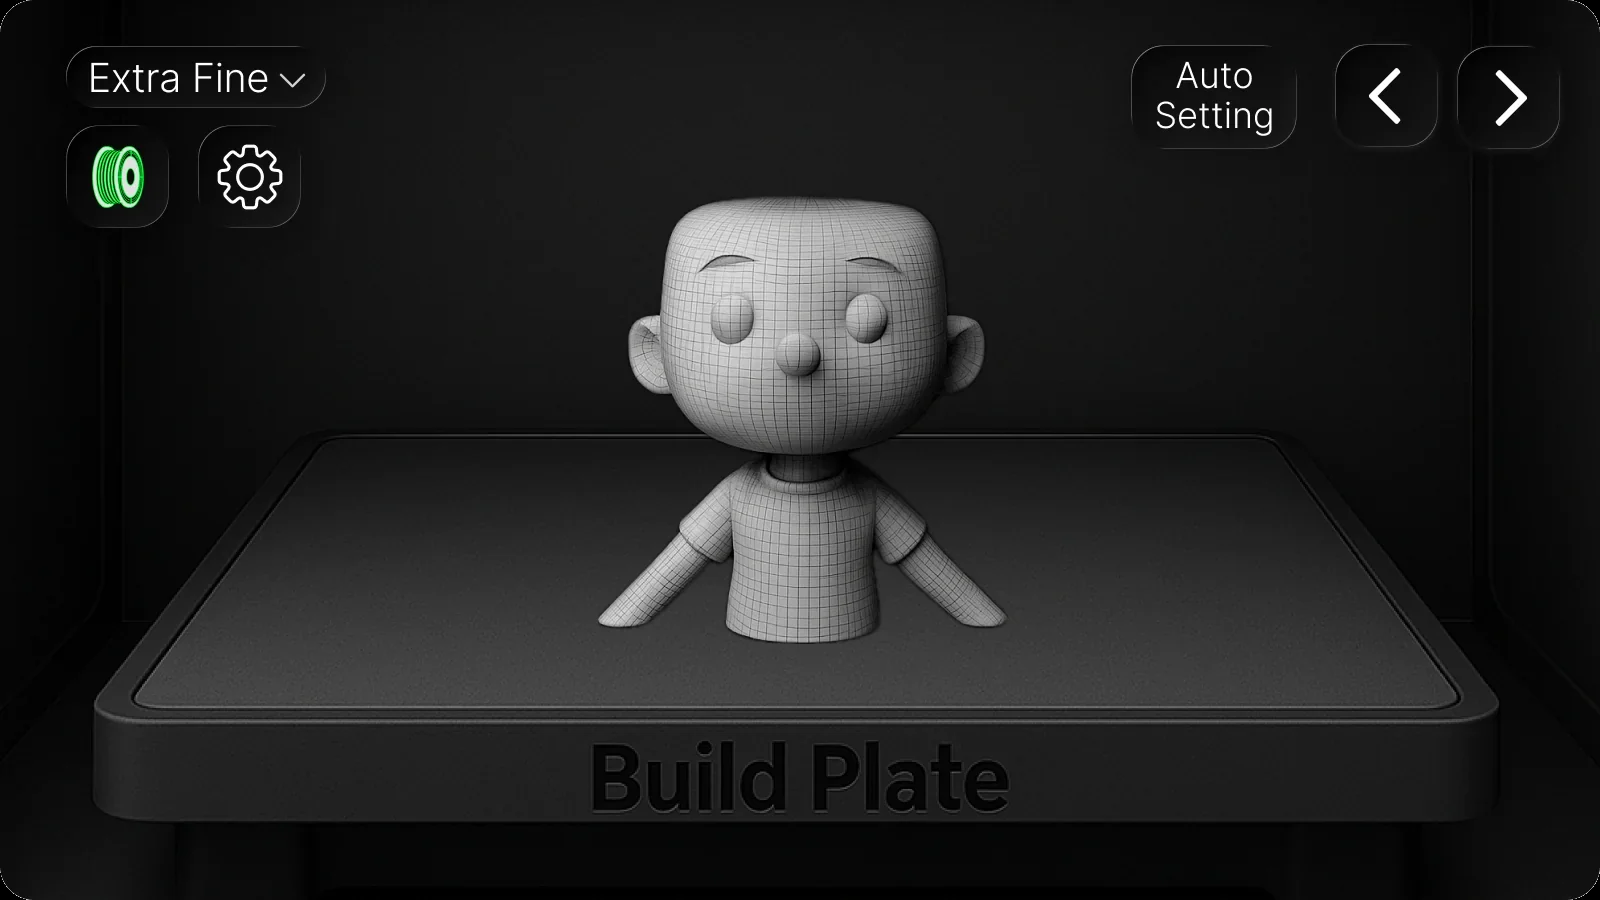
Prepare shows Extra Fine, PLA, and the bed. Auto Setting holds the rest. Start Print is the only verb that matters.

FlowPrint prepare view: Extra Fine, Auto Setting, and a bust on the build plate
Prepare: Extra Fine and Auto Setting. Start Print is the only verb

Done looks like a part

Printing is progress, not a temperature stack. Finished Printing is the object, then four facts: duration, filament, errors, layers. Proof, not a log.

Final outcome: A target journey from box to part in about fifteen minutes, designed as onboarding, material guidance, and monitoring that behave as one system.

Impact

Quiet confidence is what survives print one

The design gives engineering a prioritized surface: onboarding, monitoring, and recommendations as connected modules rather than three disconnected features.

It also sets a tone. If the first print feels like an appliance, the rookie comes back. If it feels like a workshop they have not earned, they do not.

The target journey is the claim. The live HMI is how a recruiter can walk it.

Reflection

Design for failure as the default path

Hardware-adjacent UX taught me to treat failure as the default path. Success is the exception every session still has to earn.

What I would do next

Put the target journey in front of first-time owners on a real machine: different models, different filament, a jam or a leveling miss, and see whether the next-action copy holds when the print is actually at risk.

01

Hardware UX Is Failure-First

A first print that starts and then fails teaches the wrong lesson. Design the recovery path as the default, and treat success as something the session still has to earn.

02

Renaming the Shop Is Not Onboarding

Quality and Strength were a vocabulary patch on a control panel. The real cut was taking the slicer off the first-print path.

03

The First Success Is the Retention Mechanic

Quiet confidence after a finished part is what keeps a rookie. Features they cannot reach until print two do not matter if print one never happens.

Next up

Oryne

0→1 Product Designer & Builder · 2026App Store
AI-NativeMotion DesignDesign Engineering

Locant

0→1 Product Designer & Builder · 2026GitHub
AI-NativeDesign Engineering

NeuraLyfe

Product Designer, Maker · 2026
Data VisualizationAI-NativePhysical Prototyping